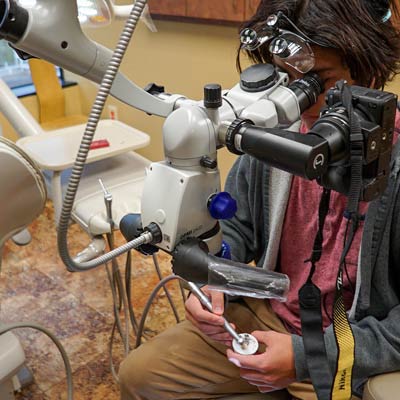
Every time I go to the dentist, I ask for a mirror to see what goes on inside. On one of my visits, I noticed that my dentist had just gotten a Zeiss microscope, which he used while operating on me. This time, instead of asking for a mirror, he switched on a screen, and there it was. On the screen was what he could see through the microscope. The projection on the magnified image fascinated me because of vivid details and image quality.
Not only did I have a clearer view, but with the magnification, I could see all the little details I never thought existed. Intrigued by this microscope application, I asked Dr. Shimizu if I could do an internship to observe how microscopes could be used in dentistry. He accepted it, and in the end, I even got the chance to try the microscope myself and operate on models.
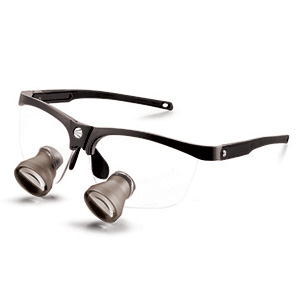
Surgical Loupes
First, operated on the models only using loupes with 2.5x magnification, which most dentists use when working. This was my first time using a dental turbine, and it took me a few trials on stone models to get used to wielding the turbine. Then I finally got my first real tooth-an extracted one-to drill. Using the loupes, I could see better than I could with my bear eyes. The task required immense concentration but also a great sense of space.
Even with the loupes, I could not effectively gauge the depth. The magnification allowed me to better understand depth with my bare eyes, but I could not keep a consistent depth of 1.5mm (the recommended depth for onlays).
Most of what is to blame for my lack of experience with the turbine, but I could barely tell the difference between 1mm and 3mm with the loupes. Though I was unable to gauge the depth, I was able to drill and flatten out the bottom of the hole, or so I thought.
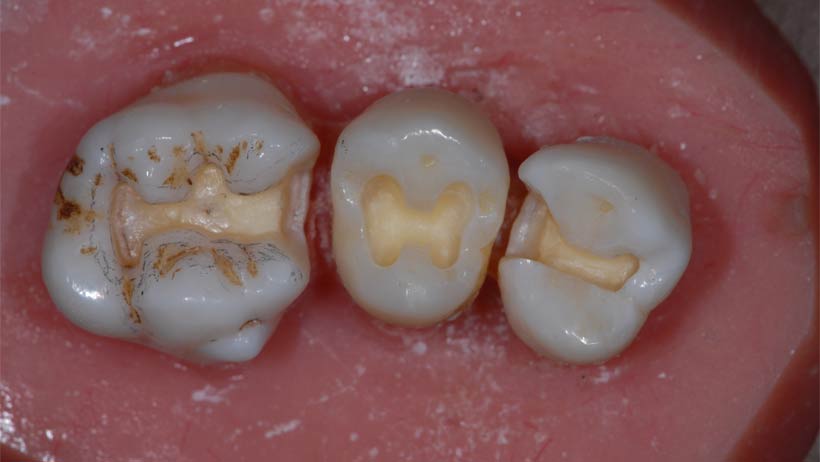
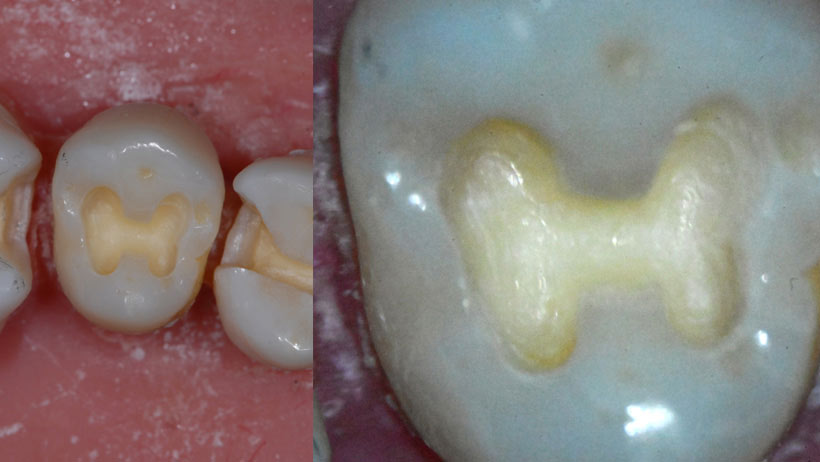
When viewed under a microscope, the surface is rough.
After I finished drilling with the help of the loupes, I observed the samples through the microscope under 25x magnification. To my surprise, the surface I thought I successfully made flat and even was as bumpy as the skin of a toad, and some parts were highly shallow while others were too deep.
In my opinion, the worst kind of failure is when you fail at something you think you did well. Though I could not get the proper depth, I was confident that the hole I drilled was smooth and even, but I saw that I had utterly failed.
I was astonished by the differences I saw when looking through a microscope but also wondered why such an extreme level of precision was necessary. It seemed almost perfect when I looked through the loupes, so I didn’t quite understand the need for such accuracy.
Dental microscope for precise treatment and cosmetic work
I learned that the smoothness of the hole is a crucial factor that determines the success of the treatment. Removing cavities is a two-part treatment. On the first visit, the dentist removes caries and places a temporary filling after taking a mold of the tooth. The dentist sends the mold to a dental lab, where a technician constructs a permanent crown, inlay, or onlay.
After the dentist receives the finished product, the patient returns for a second visit, where the dentist removes the temporary filling, replacing it with the permanent restoration. One factor determining the restoration’s quality and durability is the smoothness of the tooth.
It would seem that having a rougher floor would be better because it offers a better grip. Still, in reality, this is a disadvantage that weakens the structural integrity of the restoration, making it much more prone to cracking.
It is also essential to smooth out the edges of the hole for the same reason. Having sharp corners or edges rather than smooth ones causes pressure on the tooth differently, and restoration results in unequal pressure points. These sharp edges subject-specific areas to a large amount of physical stress, increasing the likelihood of the repair to crack.
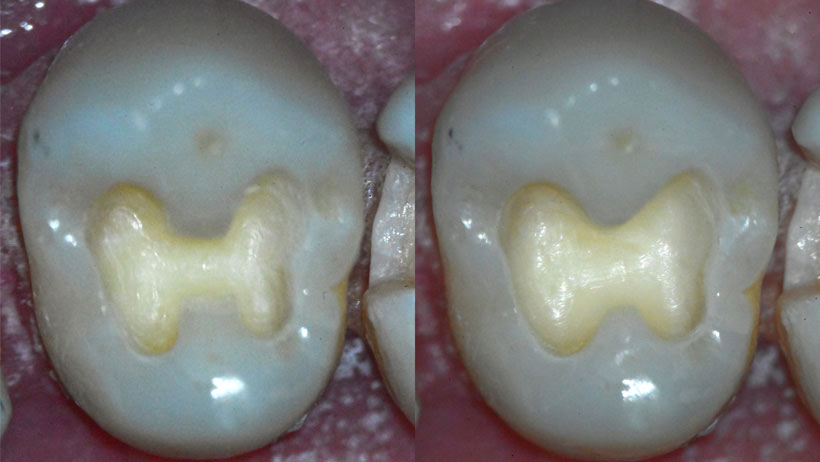
After learning about the importance of smoothing out the hole, he let me continue operating on the same tooth using the microscope. With this, I could work with an astonishing increase in precision. Gone was most of the roughness, and I could flatten it out completely.
I measured the depth afterward using a periodontal probe (dental ruler) and saw that I did a decent job keeping the depth at 1.5mm throughout the hole. More importantly, I could smoothen all the rough edges, eroding the sharp corners into bullnose edges. All these factors increase the durability of the restoration.
Endodontists typically use these microscopes, who require high level of precision to locate and maneuver through the narrow root canals. Very few general dentists currently use microscopes, partly due to costs and partly due to disregard for such precision.
Only through a microscope are most of these differences visible, yet accuracy is critical. These techniques are the main benefits of using the microscope, but there are also substantial ergonomic benefits.
Good posture for dentists while working on your teeth
The average dentist spends about 30 hours a week operating on patients. In many cases, dentists may adopt positions that strain the back to get a closer look at patients.
A meta-analysis conducted by Chikte found a combined prevalence of thoracic-lumbar pain (Upper/middle back) in 53.9% of dentists and neck pain in 41.4%1.
This strain is reduced when using the microscope as it allows the dentist to operate with a straight posture. Without the constant tension, dentists feel less stressed. So they can focus more on the operation, improving the quality of each treatment.
This experience was fascinating. I had always pictured dentists with funny-looking glasses, but now, some have those glasses and high-tech microscopes. By experiencing some of the tasks that dentists perform regularly, I gained greater insight into dentistry and learned that constant improvement could achieve accuracy and efficiency.
1. Chikte UM, Khondowe O, Louw Q, Musekiwa A. A meta analysis of the prevalence of spinal pain among dentists. SADJ. 2011 Jun;66(5):214-8. PMID: 23193861.
About the author
I am Jean-Luc Shimizu. My father is in fact Dr. Shimizu and it was an amazing experience seeing the professional side of him. In my list of possible careers, dentistry is one that sits high in the ranks. Being able to consult with him basically any time I want is a gift I greatly appreciate.